Basic Teaching of Viola
In today’s session, Professor Wing Ho will talk about issues related to basic teaching of viola. We suggest that viola teachers hold the instrument while reading the article so that they can go through all the details mentioned.
Content of Wing Ho’s lecture is as follows (edited in first person):
Left Hand
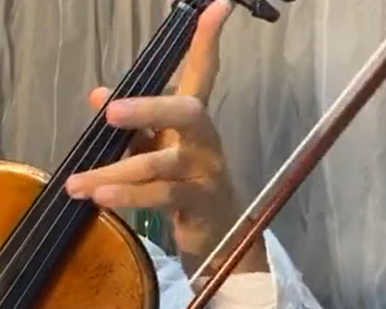
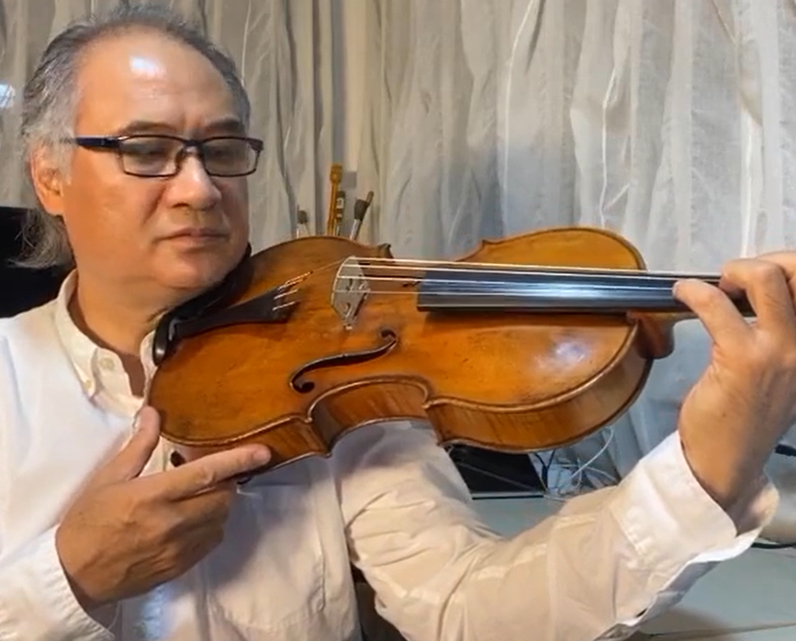
We should normally have two contact points between our left hand and the viola neck. Let’s take a look at the picture below.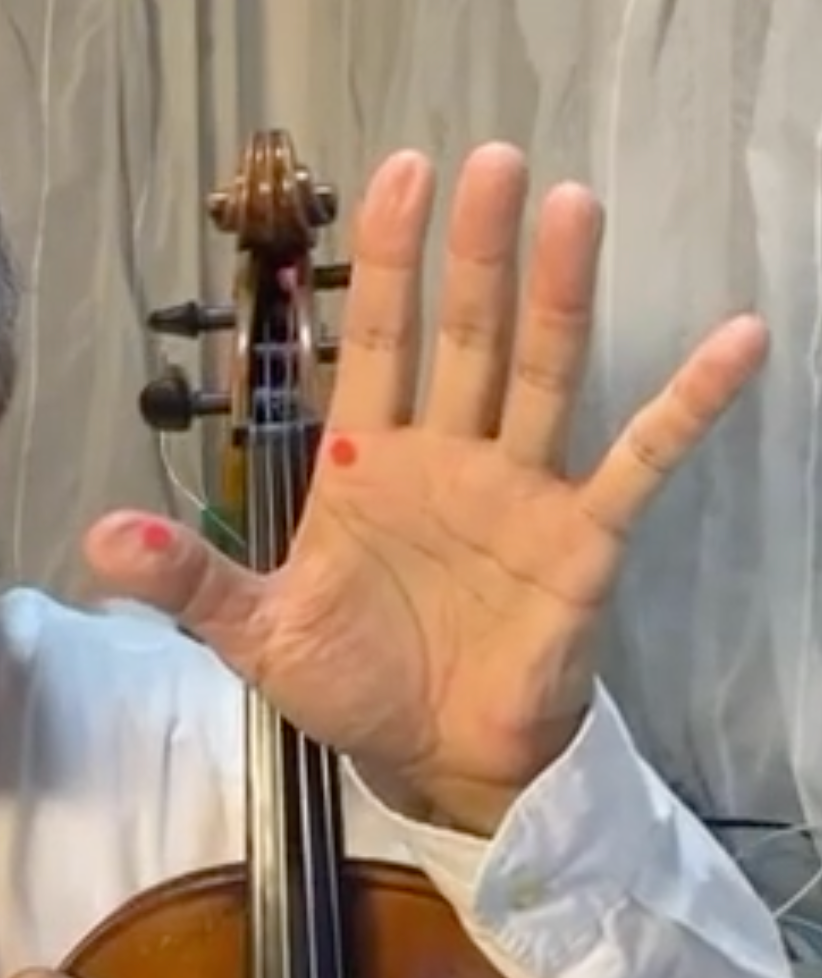
The first contact point is below the index finger, as shown in the picture above. When we hold the viola, the neck is placed there. It plays a role of a shaft, which helps us move the left hand when shifting the strings and changing the positions.
Actually, there are other ways of holding the viola. For example, holding the instrument with the first knuckle of the thumb. But I recommend that students place the neck at the contact point shown in the picture, because in this way, each finger can have an individual position while playing.
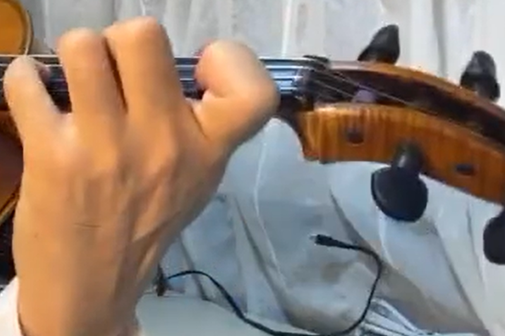
The second contact point is above the first knuckle of the thumb. It is the contact position of our thumb on the viola neck. Some students may place the first knuckle of the thumb on the neck and sometimes their thumb may touch the G string. Therefore, the contact position demonstrated in the picture above is a better choice. It also makes us play more comfortably.
As for the other four fingers, we should find the balance point of our left hand and the correct positions of the four fingers so that we can apply strength to the fingerboard and play comfortably. We need to bend the fingers and place them on the fingerboard.
The back of our left hand, our wrist and our forearm should be in a line. The wrist should keep flat without bending backward or forward. Also, our fingers should not stretch.

We should pay attention to the movements of our fingers while playing the viola. There are two ways for us to train our fingers. The first one is bending our fingers like scratching an itch.
The second one is touching the left thumb with the other four fingers on the left hand. It can help us understand the “independence” of the fingers. To improve the “independence” of the fingers, students can put an eraser between every two adjacent fingers while practicing. Some students who have smaller hands or shorter little fingers tend to stretch the little finger while playing. This training method can effectively help them avoid the problem. When we are playing, we should bend our fingers instead of stretching them.

If we do not train our fingers properly, the strength of our fingers cannot get improved. When we are pressing the strings, we should make sure that the movements of lifting fingers up and down are fast, like hammering. We can see that there are marks on our fingertips after pressing the strings.
The positions of the marks should not be shifted while playing the viola, which is to say, after pressing the strings, there should be only one mark on each fingertip.
Overall, there are four things we need to pay attention to when training the fingers. First, touching the thumb with the other four fingers, which can help us avoid the problem of stretching the little finger. Second, bending our fingers like scratching an itch, which can help us find the right positions of our fingers while playing. Third, lifting fingers up and down like hammering. Fourth, memorizing the positions of the marks on our fingertips after pressing the strings. The latter two things can help us improve the strength of our fingers.
There are two ways of pressing the strings. When we are playing slowly, we can use the finger pulp to press the strings and our fingers can stretch a little bit. When we are strolling, we are quite relaxed. Likewise, our fingers can be relatively relaxed when we are playing slowly.
When we are walking fast or running, we have to bend our legs. Likewise, when we are playing fast, we need to use fingertips and bend the fingers.
To sum up, we should pay attention to the two contact points between our left hand and the viola neck, the movements of our fingers while playing, and the ways of training the fingers and pressing the strings.
Right Hand
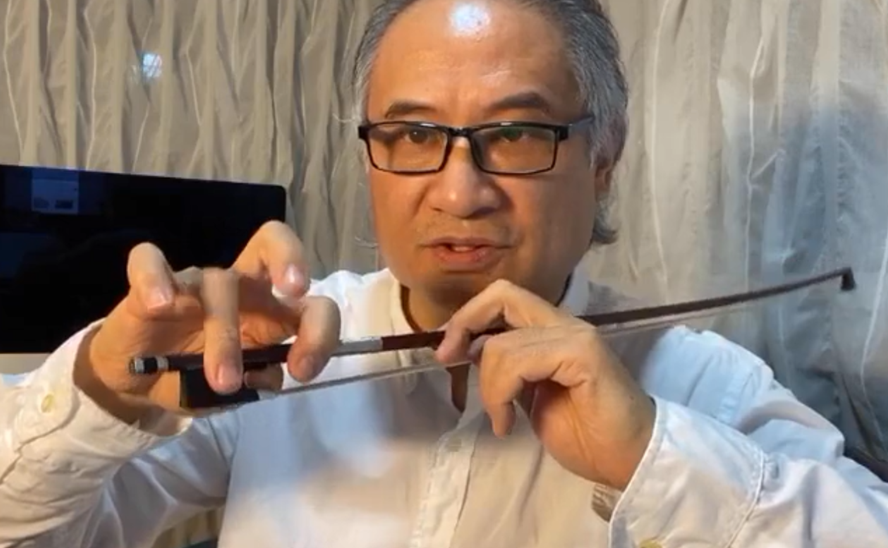
The way of holding the viola bow is not difficult. When we are holding the bow, our right thumb should be placed close to the middle finger on the right hand. Also, the first knuckles of our index finger, middle finger and ring finger should be placed on the stick, and we need to cover the bow eye with our ring finger. Besides, the balance point is on the fingertip of our little finger.

We need to make sure that our fingers are isolated from one another. Likewise, the back of our right hand, our wrist and our forearm should be in a line, and we should not stretch the fingers on the right hand.
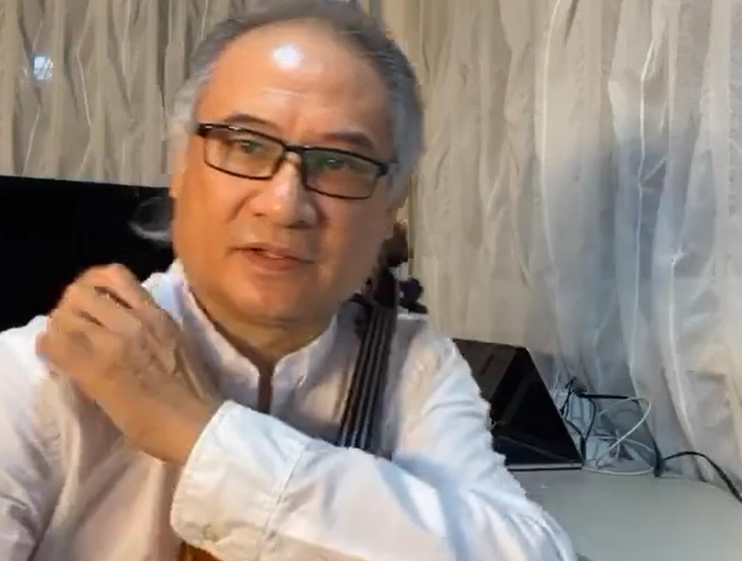
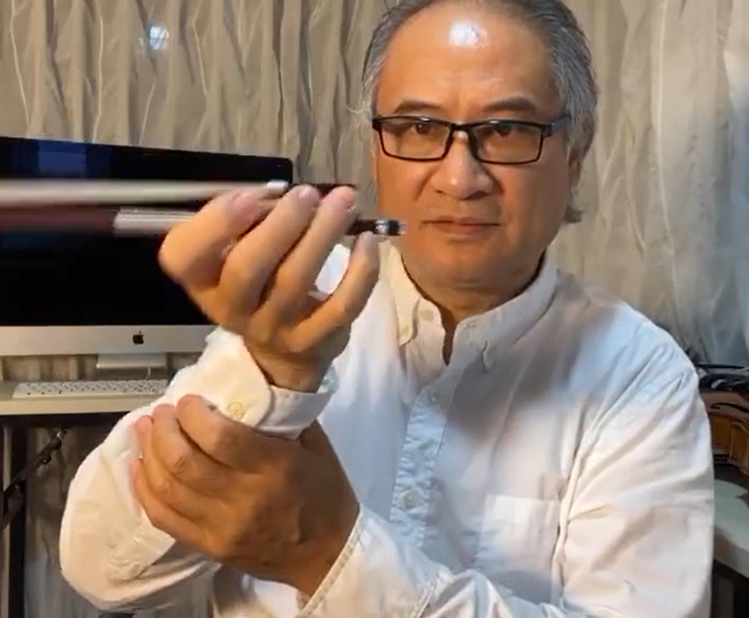
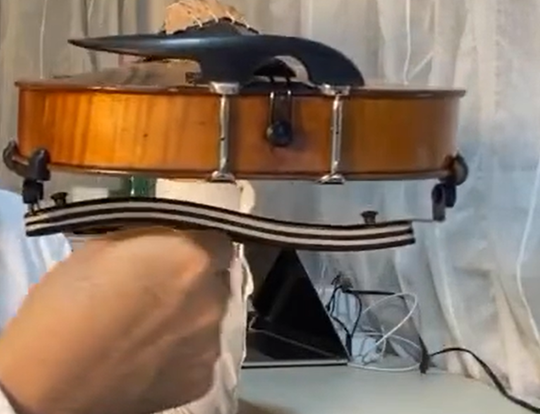
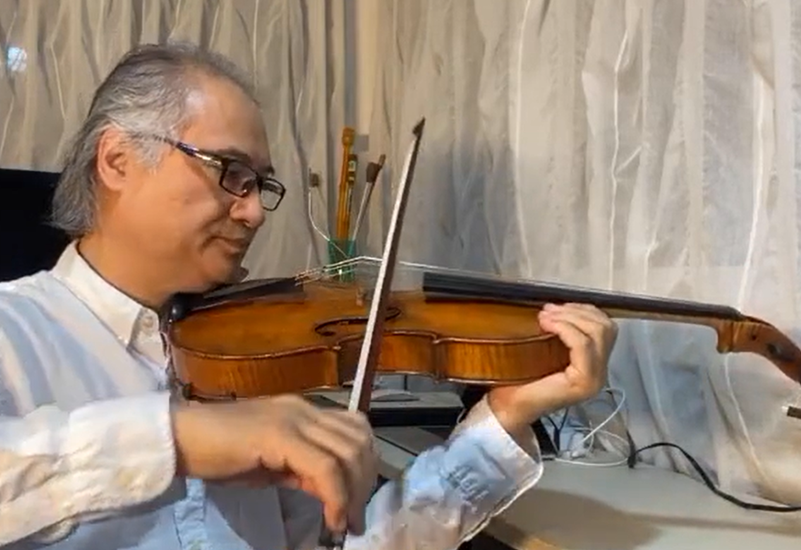
During the practicing of holding the bow, we can hold the right wrist with our left hand, place the bow on the shoulder, and bend our wrist up and down.
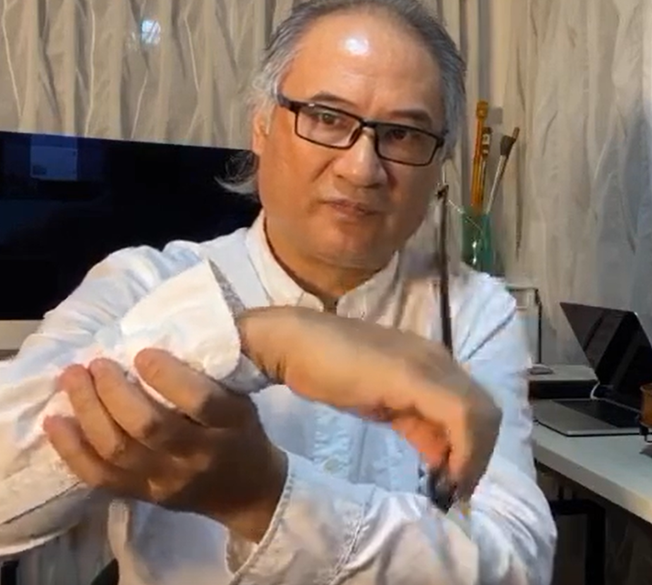

We can also move our wrist back and forth.
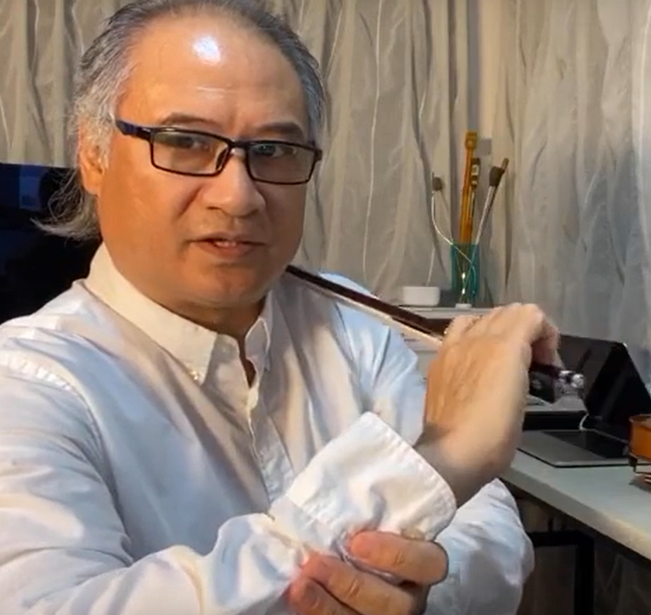
The flexibility of our fingers on the right hand can be increased in this way. We should not hold the bow too tightly while playing. When we are holding the handrail on the subway, we tend not to hold it firmly. Likewise, our right hand tend to be relaxed while holding the viola bow.
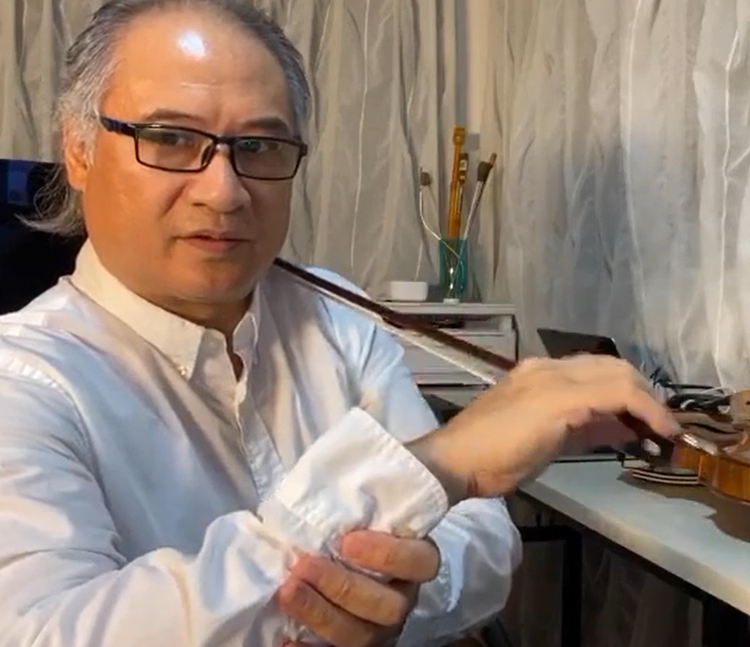
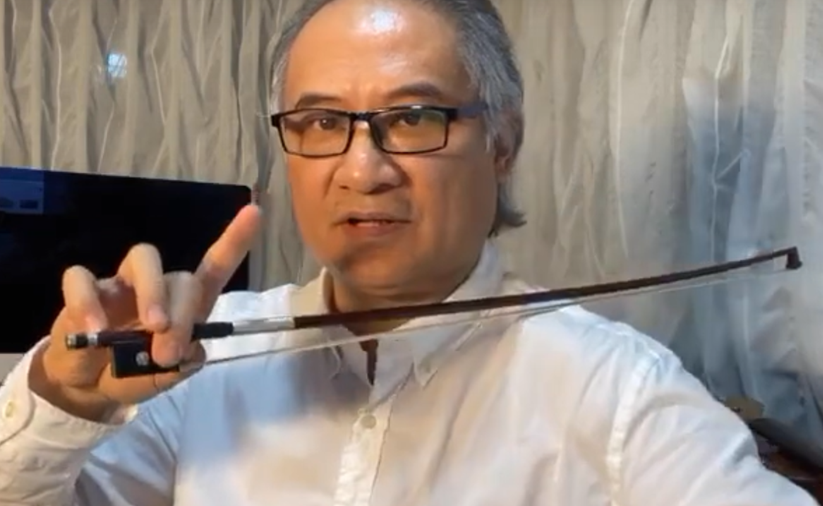
Then, when we place the bow on the shoulder, we can try to lift our index finger and ring finger at the same time, or middle finger and little finger in the meanwhile, to understand the “independence” of the fingers. Remember not to apply too much strength to the bow.
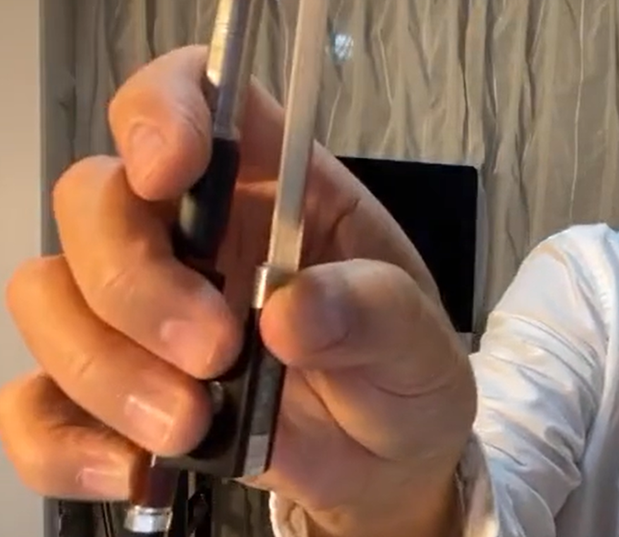
Later, we can rotate our wrist in this way while holding the bow:
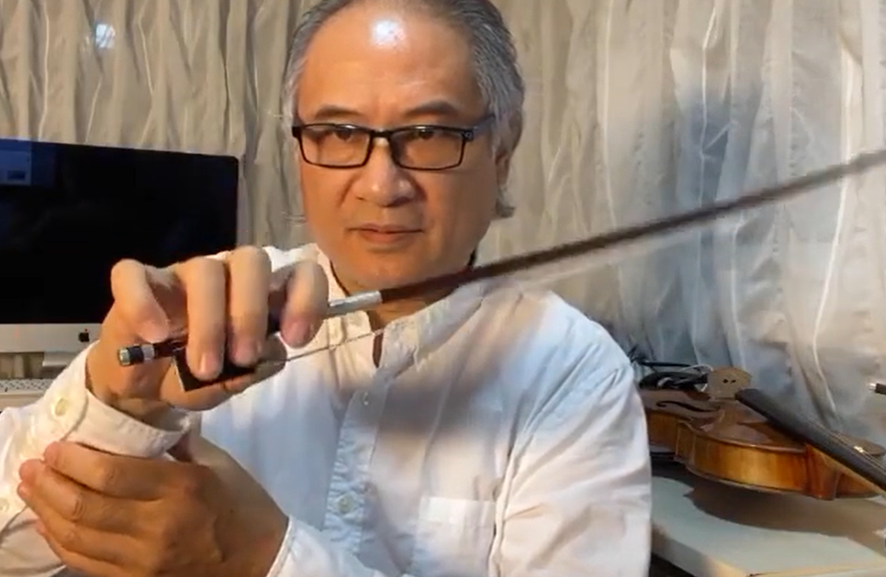
The balance point is on the fingertip of our little finger. Some viola players may lift their little finger when holding the bow, which does not influence their playing. But for students, they need to train their fingers and form a good habit of holding the bow, so they should place their little finger on the stick. Doing the movements correctly is more important for young learners. They are supposed to know how to play with the bow flexibly at the beginning.
Young learners can use tools to help them hold the bow correctly. Actually, they are likely to form a good habit of holding the bow in two or three weeks if they use the methods of practice mentioned above. For those learners who started to learn the viola at an early age, they can place their thumb on the bottom of the frog at the beginning and get used to the hand position first. After increasing the flexibility in their fingers, they can place their thumb on the stick.
The most important thing is being relaxed while holding the bow. Imagine that we are twirling walnuts in our hand. Then we can understand how to relax the right hand.

Chin Rest
There are many different types of chin rests. The one I use is a Stradivari-style chin rest. The Guarneri-style chin rest is also popular. The chin rest can make us play more comfortably. Actually, the ancient viola did not have a chin rest. Also, playing ancient music did not require players to change the positions frequently.
No matter which brand of chin rest we are using, we should know that when we hold the viola, the tailpiece should be vertical to the midline of our body. Our head should not tilt. What’s more, the chin rest of the viola should not be placed too high.

Shoulder Rest
Personally, I use the shoulder rest while playing. Some teachers do not use shoulder rests. Shoulder rest is an important tool which can prevent slipping and help us relax while playing. A shoulder rest of high quality should not fall off the viola after several hours of playing. Also, the height should be adjustable. My favorite brand of the shoulder rest is Pedi.
For teachers, they are supposed to know how to adjust the angle of the shoulder rest. The concave side of the shoulder rest should be placed on the shoulder while playing.
For students, the height of the shoulder rest should not be too high, and the angle is also important. Actually, they can start from using sponges.
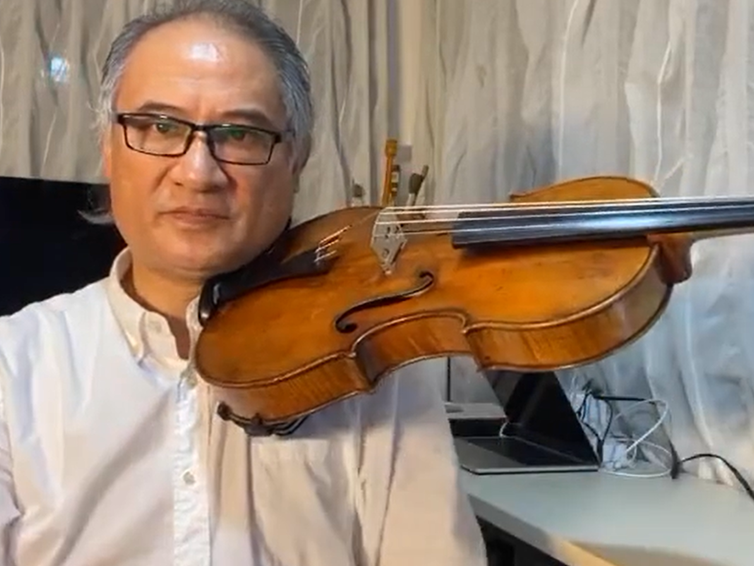
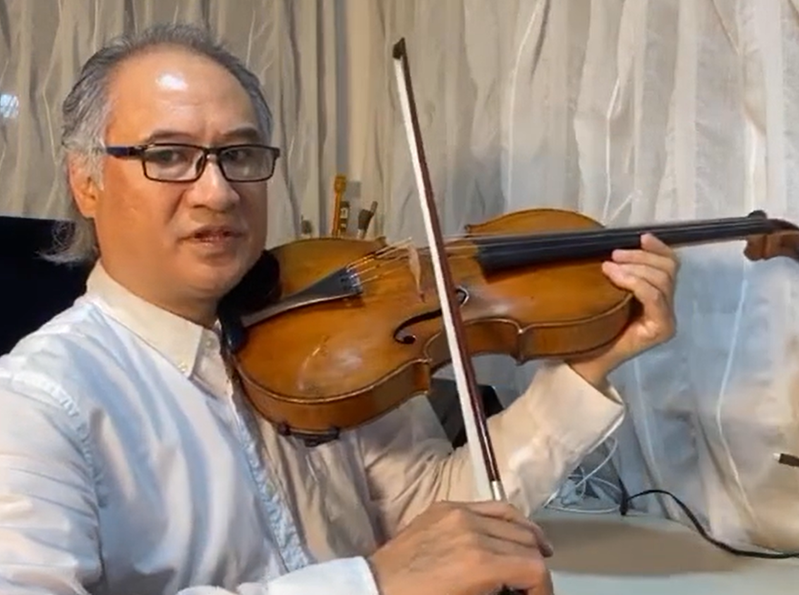
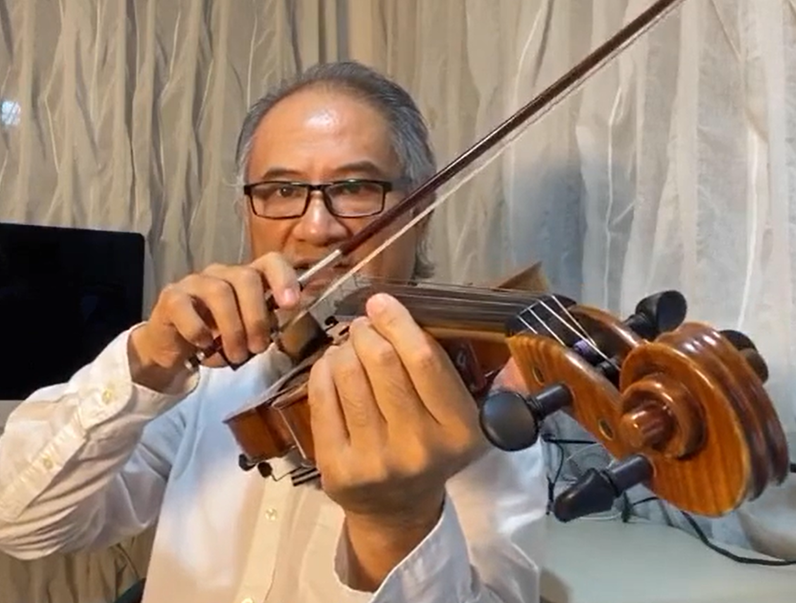
Holding the Viola
When holding the viola, our head should not tilt. We are supposed to tilt the instrument to the left, and the angle between the viola and our body right front should be 45 to 55 degrees. The angle tends to be a little bigger sometimes. If the angle is too small, the quality of the sound produced and the tension of the instrument may be affected.
We are supposed not to look at the instrument while playing, but when we need to look at the viola, we should turn our head in this way:
Our neck should be in contact with the lower bout of the instrument. Both our head and shoulder should be relaxed. Besides, the angle between our forearm and upper arm should be smaller than 90 degrees.

Otherwise, we cannot play the viola comfortably. For young learners, if the angle is bigger than 90 degrees, it means that the instrument being played is too big for them. Playing on an oversized instrument can make young learners develop bad habits.
During playing, the back of our hand, the wrist and the elbow should be in a line. If the viola is too big, the hand position, the flexibility in our fingers and the speed of playing can be affected. In addition, during playing, we should make sure that the viola strings are parallel to the ground.

Posture
Your temperament can be observed from your posture. Posture training is significant to every viola learner. Once students start to learn viola, they are supposed to improve their posture.
We should stand still with our feet shoulder width apart while playing. Our left foot can tilt a little bit, and the angle between the foot and the midline of our body can be about 30 degrees. When we are on stage and facing the audience, our body can turn 45 degrees left so that we can be seen from every direction. We need to look at the audience and be gracious. We should convey the feeling that the thing we cherish the most is about to be dedicated to the audience.
Breathing
We can take a deep breath before performing to relieve tension. But once we are already on stage, we should avoid deep breathing, or we may need more time to get ready for the playing. When we are on stage, we can increase the breathing rate and try belly breathing to relieve tension.
During playing, the rhythm of our breathing should match the rhythm of the music. Breathing can help us express the emotions while playing. Also, we can collaborate better with others if we know how to breathe while playing. All viola players should practice breathing.
When we are playing phrases with upbeats, downbeats, syncopation or accents, like the beginning of Walton’s viola concerto, we should pay more attention to the breathing. Viola teachers should teach their students to breathe properly while playing every phrase.
Bowing
In Mr Fu Tong Wong’s books, he introduced the pithy formulas of bowing, which are good for students to understand the movements. When it comes to bowing, many viola teachers will teach their students how to change the bow. They will focus on the movements of fingers and wrist. On the purpose of training, it really benefits students.
In my opinion, when we are changing the bow, our fingers on the right hand should be flexible, but they should not move. Unnecessary movements should be avoided. Also, I prefer the way of playing the cello when playing the viola, which is to say, the hand position should not change.
When we are playing, our arm should not be stretched. There should always be an angle between the upper arm and the forearm, or our arm may be stiff. Some students have bad habits while playing, for example, the movements of their elbow may be unnatural, as shown in the pictures below.

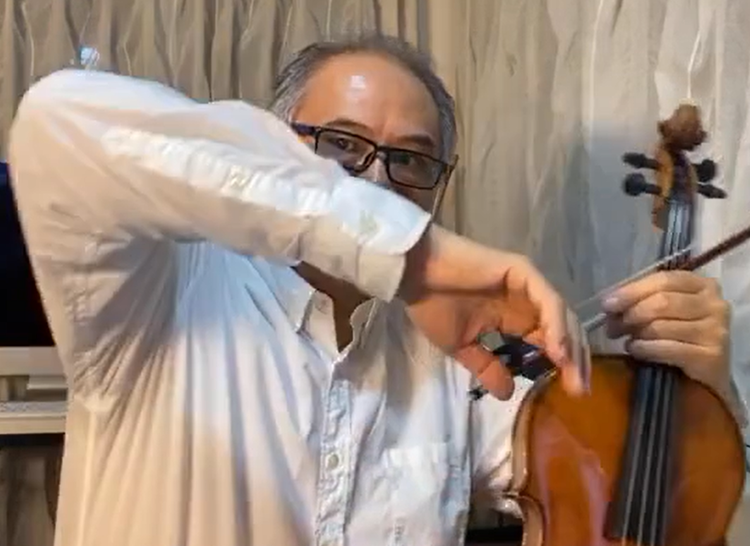
We need to pay attention to the movements of the upper arm while shifting the strings. Also, we should notice the movements of the forearm while changing the bow. We can imagine that the camera lens is a mirror. Then we can use this mirror to check the movements.
The bow should be kept straight while playing. When we reach the bow tip, the stick is parallel to the upper arm.
When we reach the middle of the bow, the stick is still parallel to the upper arm, and the angle between our upper arm and forearm is 90 degrees.
When we reach the frog, the bow tip, our right hand and our elbow should be in a line.
This is a simple and effective way to check our movements of bowing. Then we can make adjustments.
Audience: What should I do if I cannot bend the little finger on the right hand?
Wing Ho: I had a student who has big hands and short little fingers, and his little fingers are crooked. We need to train the fingers and solve the problem. As I mentioned above, we can bend our fingers like scratching an itch. Many problems can be solved if we do train our fingers in this way.
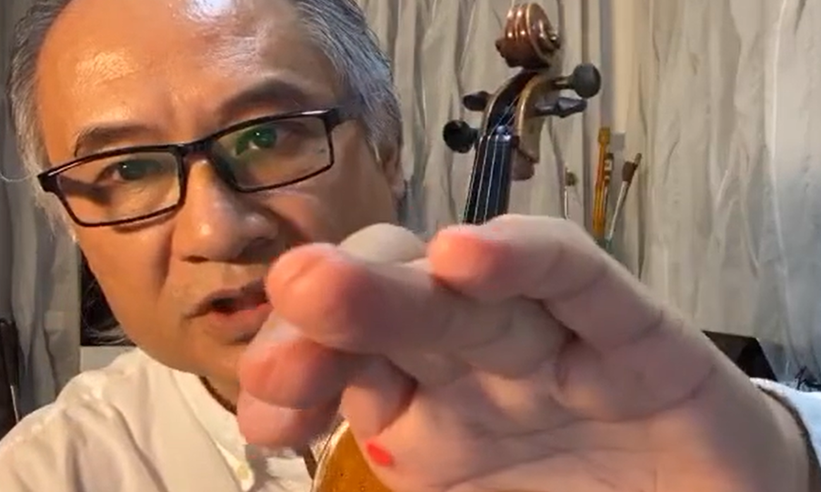
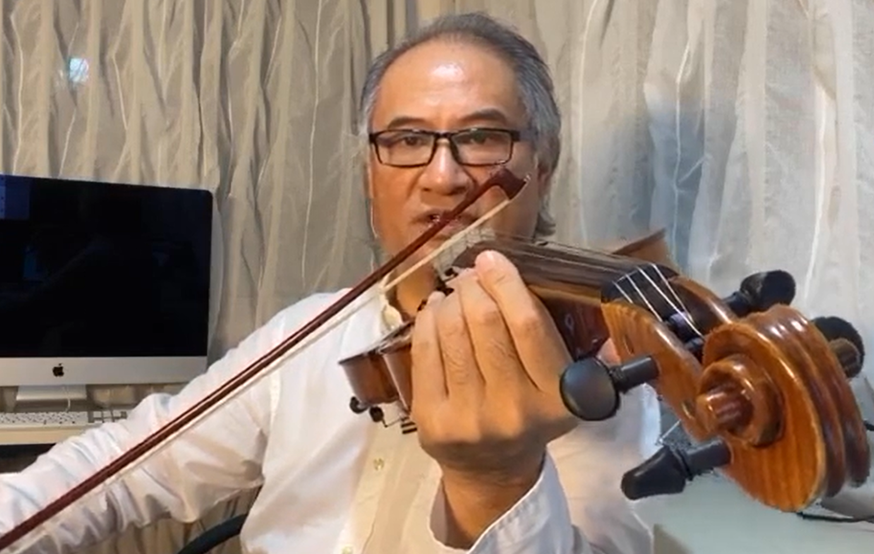
Audience: What if my thumb falls off the stick when I hold the bow?
Wing Ho: We can see the contact point between our thumb and the bow in the picture below. Our thumb should be placed there.
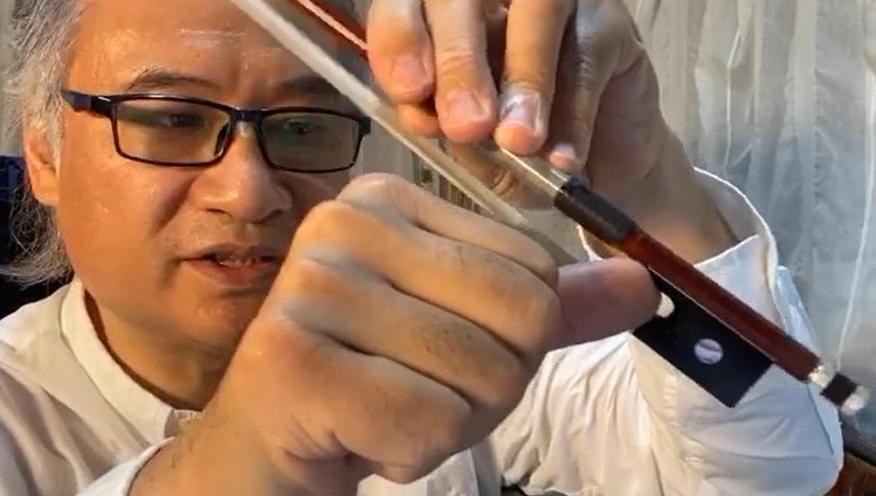
If we are using a new bow and feeling pain when placing the thumb on it, we can sand it and round off the sharp corners.
Music Q&A
Audience: What if I cannot reach the bow tip while playing?
Wing Ho: There can be various reasons behind the problem. Maybe the bow you use is too long for you. Then you should switch to a shorter one. On the other hand, sometimes it is not necessary to reach the bow tip. Our arm should not be stretched while playing.
Audience: I am a college student. There are still problems with the movements of my hands. What should I do?
Wing Ho: Actually, all viola players can try the ways of training the fingers that I introduced today. If we can understand the ways well, many problems can be solved.
Audience: When we are playing the A string, should we change the contact points between our hand and the viola neck?
Wing Ho: The instrument is not fixed at the contact points. When we are holding the handrail on the subway, we tend not to hold it firmly. Likewise, our left hand tend to be relaxed while holding the viola. No matter where we place the neck, the index finger should always be placed above the strings. Also, when we hold the bow, I recommend that we place the first knuckles of the fingers on the stick, but the contact points between the fingers and the stick are not fixed. We should know the right hand position while holding the bow.
Audience: When I hold the viola, the scroll of the instrument is placed low. What should I do to solve the problem?
Wing Ho: Maybe your viola is too big for you, or you did not hold it in a right way. Our neck should be in contact with the lower bout of the instrument when we hold the viola.
Audience: Where should I place my left thumb when holding the viola?
Wing Ho: As I mentioned above, the contact point between the thumb and the neck is above the first knuckle of the thumb. In this way, our thumb can be more flexible when changing the positions. We can train our left thumb by moving it back and forth when holding the instrument.
Audience: How to select suitable viola bows for children?
Wing Ho: There are several sizes for viola bows. I will talk about the sizes in detail in next sessions.
Audience: How to adjust the parts of the viola?
Wing Ho: You may get help from your viola teacher. Every viola teacher is supposed to know about the adjustment and maintenance of the instrument. The viola bridge is likely to fall out of its place after some time. We are supposed to adjust it regularly. When we adjust the bridge, we can place the viola on the lap, grip the bridge with both hands and put it back in place. Then we can check if it is vertical to the body of the viola.
Audience: My hands are sore after playing the viola for some time. What should I do to relieve the pain?
Wing Ho: If our hands are flexible enough, we will not get tired after playing the instrument. But if our hands are stiff, we are likely to get tired easily. When we are playing the viola, our neck, back, shoulders and hands should all be connected to each other. A friend of mine said that the rooms in a castle were interconnected. Our body is like a castle, and the body parts I mentioned above should be connected to each other when playing the viola.
Have a HAPPY practice!!
All About Viola - Viola Teaching Class
All about Viola 1 | Tips about Enlightenment Teaching of Viola
All about Viola 2 | Basic Teaching of Viola
All about Viola 3 | Viola Bowing Techniques
All about Viola 4 | Movements of the Left Hand
All about Viola 5 | Viola Exercises for Beginners
All about Viola 6 | Common Viola Repertoire Catalog
All about Viola 7-8 | Music Learning and Career Choice
More Violy Master Class Articles:
Cello Master Class - Wu Linfeng
Violin Master Class - Wang Boyang
Violin Master Class - Gu YingLong
#ViolyPractice makes Perfect!!
Follow us on: Violy.app